Maya Intro: 14/09/20
3DCTM1. Understand the basic components of a 3d model.
A vertex is the smallest component of a polygon model. It is a point in a 3d space. If you connect multiple vertices with edges you will eventually create a polygon which can be manipulated to create any shape you wanted.

An edge is another component of a polygon. Edges help define the shape of the models, but they can also be used to transform them. An edge is defined by two vertices at their end points.
A face is the most basic part of a 3D polygon. When three or more edges are connected together, the face is what fills in the empty space between the edges and makes up what is visible on the polygon mesh.
3DTCM3. Know how to use a 3D modelling package.
I learnt the basics of movement and shape building today. the controls are a bit tricky to get the hang of but eventually i’ll be fine with them. Our objective was to use the basic shapes and tools at our disposal to create a little scene.

once we were set off for about 20 minutes, we had been tought about the basics of polygons and the components they are made from. We also got the chance to edit the vertices and faces (by holding right-click over the shape )of the shapes we created to allow a better shape to be produced.
3D Spaceship- Matt
For our first project with Matt we had to make a spaceship using Maya 2018. In this project we were told to only use primitive shapes, therefore my whole ship was built using a single cube and the extrude tool. First I used the extrude tool to make a ‘cockpit’ and the tail section. I moved the cockpit down so my ship had less of a straight 4×4 wooden plank look and tapered the corners inwards so the cockpit didn’t look ‘boxy’ as I said before. Same went for the tail section, I tapered that upwards so my ship had more shape. Once I was happy with this I decided to add some extra detail to the tail section as if it were one massive booster at the back pushing the ship forwards. Now that this was finished I went to work on the wings. These were pretty basic and were also edited to look like they were tapering downwards and given an extra second wing on the edge of each wing. Now I was happy with what I could do since I was limited with the tools I could use.


Here is my (somewhat) final ship design before I tweaked it and designed the texture.

My design for the ship was just going to be neon lights across the ship but I couldn’t get a glow effect on photoshop to work so I switched to a camouflage pattern. When uploading to sketchfab, Robin showed me a way to make certain parts of my ship reflective so I made the cockpit reflective. Also the white spots on my ship decided to go reflective as well but it does look cool so I left it.
3D Drone Ideas-

Idea 1) Combat Drone: I have always liked military themed projects and this is perfect. Its purpose is to be deployed into combat zones across the world and provide support to soldiers in all types of missions. It improves the world by limiting the amount of casualties and could prevent things like assassination attempts. It will use 2-4 propellers to move about and will alternate between being solar powered and kinetically powered. Mainly military personel will have access to this but pmc’s have been know to claim any that arent active.
Idea 2) Medical Drone: This drone will be dispatched earlier than ambulances or other emergency services and can administer treatment before people arrive on sight. It prevents casualties and limits deaths caused by not being able to arrive on the scene on time. It also uses 2-4 propellers and is powered by kinetic energy. Hospitals will be the main owners of these drones but militaries will have them also.
Idea 3) Delivery Drone: This drone will help with situations like we are in now and help prevent delivery workers from catching the virus. These will be used to deliver anything to vulnerable people around the country. It will have 4 propellers to support the weight of any parcel. It will be powered by solar energy. Companies such as Amazon or Ebay will own these.

My Favorite idea is the military drone as I can be flexible with my design since it wont be displayed in front of the public, possibly causing scares. The top 3 photos are different but are viable as military drones. I really like the middle picture, which looks like a futuristic helicopter.
Concept Art for drone- 01/10/2020

This drone concept does take heavy inspiration from a drawing I found on google but I have my own ideas which will end up changing the final look. Out of all my drone ideas i really liked this as in my head it reminded me of some sort of ‘junkyard’ robot that’s been scrapped together from salvaged and repurposed to fight. It looks very complicated to design some of the body or even the propellers in some points. I will have to simplify the designs across the model as well since I don’t know how to implement those “circuit board” type designs into it yet. Certain details like the gun on the front of my combat version or the radar dishes on my communication version will be hard to model without a bit of practice before hand.

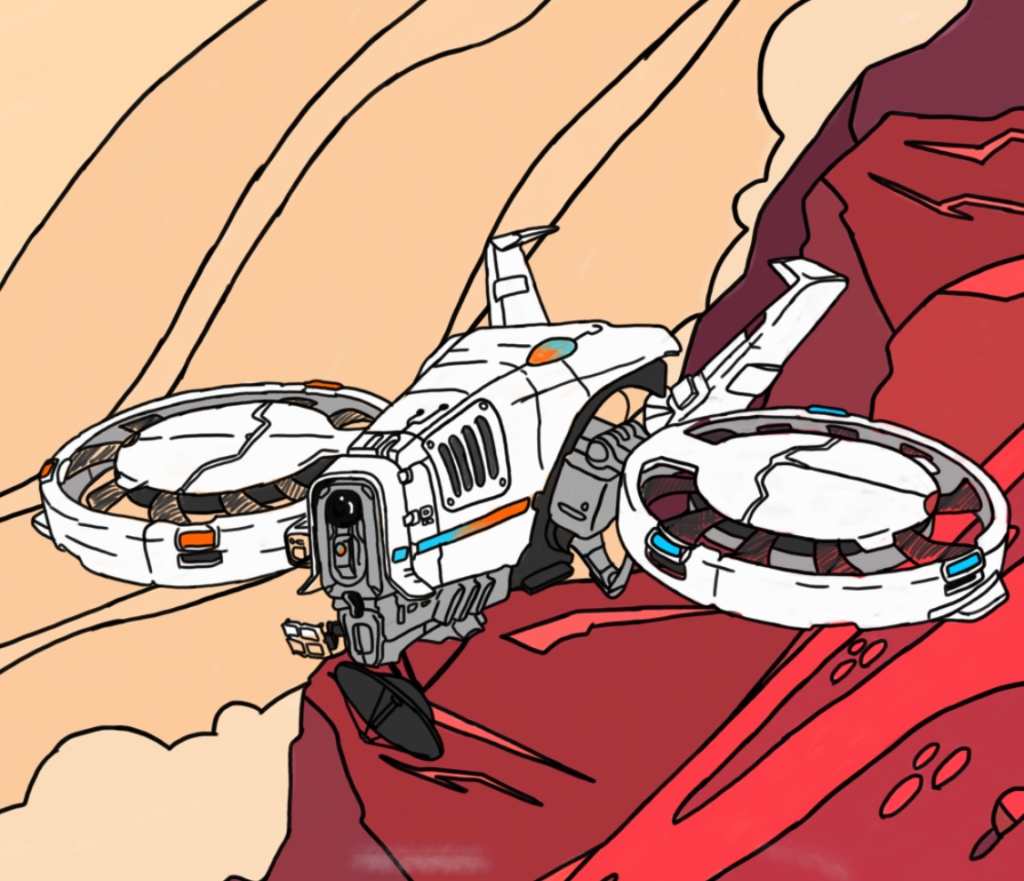
Final Concept– 05/10/2020
(This won’t be possible in maya for me YET, my maya model will be a simplified version of this final concept). My final concept for my Exploration drone includes a full white shell, with blue and orange accents. I wanted the portal aspect from the portal games, therefore my drone will be able to use long range portals to traverse various landscapes. Under the main camera/eye there is a blue/orange orb which will be where the portals come from. The ‘containment’ for the portal liquid is little pods on the propeller shells and a larger pod on the back end of the body. To compensate for the long ranges the drone will be travelling, it will need a way to communicate with the facility it came from, so I added a radar dish to the front end to be able to transmit data and contact the facility. Depending on its location, on or off planet, the drone will have interchangeable parts such as; booster engine or extra propeller. The extra propeller will mainly be for earth exploration while the jet engine will be for off planet use as the atmospheres are different. Portal liquid will be interchangeable as orange/blue will be long range, red/yellow for short range and green/pink would be mid range. (Obviously if you look at the bottom of this entry you will find i have made a stealth drone instead.)
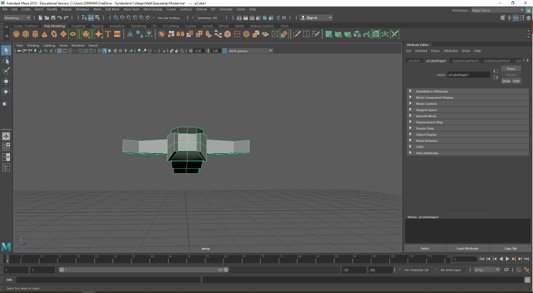
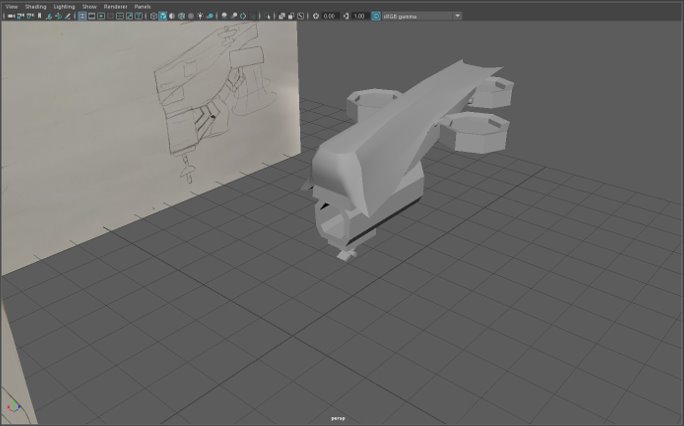
Drone Modelling- 08/10/2020


I used the front view and the side view to help create the first bit of structure on my drone. At first i used the side view to get the profile before I move onto the front view. The main challenge was getting the drone into proportion with things like the propellers and shell for the turbine engine at the bottom. The only improvements I could make is getting the proportions spot on and adding the little details before moving on to the high polly. version.
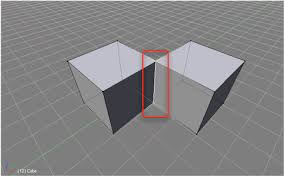
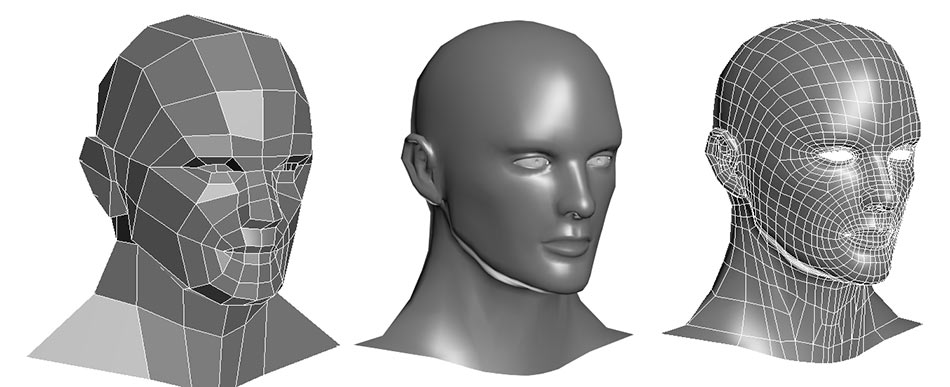
15/10/2020- Topology
What is Topology?- The study of geometrical properties and spatial relations unaffected by the continuous change of shape or size of figures. It is the way that models flow and where your polygons are.
What is a Tri?- A triangular polygon is referred to as a tri or triangle, and is a simple three-sided polygon. It has exactly 3 vertices at its corners and 3 edges connecting those points.
What is a Quad?- A square or rectangular polygon is referred to as a quad or quadrilateral polygon, and is a four-sided polygon. This is the most desired type of polygon when creating digital models.
What is an N-Gon?- An N-Gon is a polygon with more than four vertices and edges. Due to its geometric properties, an N-Gon can always be divided into quads, tris, or a combination of the two; so they are always easy to remove by adding connecting edges between the border vertices.
15/10/2020- Drone Update
Since last time I have worked on smoothing out the front end of the drone which will eventually make the camera/eye. The tail section has also been altered to come to a point at either side rather than a flat edge. I have also worked on a few more little details using the cylinder shapes to make hinge-like arms and also using the extrude tool to add depth to the turbines on the sides and back of the drone and have also added depth to the engine at the bottom of the drone. From now I need to try to alter the engine to make it fit more to the look of the rest of the drone. We are going to be UV mapping then adding a colour or texture to the piece in the upcoming weeks.
05/11/2020-
Texel Density
Texel Density is the procedure of making sure your meshes and textures are the proper height, width and depth.
Why maximise?- allows for better texturing, higher quality, consistent.

At the moment i am in the process of making each cube on the model the same size so that the whole drone will be detailed the same way and there wont be any resolution or graphic quality downgrades on each part.

I decided to re make my drone with a lower poly count so I can uv unwrap easier and texture without spending hours fine tuning everything.
I need to add textures which will suit the drone I have made.
Self Reflection- 26/11/2020
At this point in time i am just putting my final texture together properly so that parts of my drone are uneven qualities. There is a chance I could finish my drone today if I can decide on a colour palette that suits it. My drone is looking good in my opinion and Ben even said he liked it so that solidified my thoughts with the drone. My most important thing is to get my texture sorted and uploaded onto maya.
Final Version of my Stealth drone:
Now that I had finished my texture on photoshop, I changed from the un coordinated black and white mess of a carbon fibre texture map, I was able to upload my final texture to my drone.


I was able to find a generic black carbon fibre texture on google here: https://www.vecteezy.com/vector-art/1257315-black-carbon-fiber-material-texture
I was also able to find a propeller texture to use for my drone here: https://www.nicepng.com/maxp/u2w7w7a9q8a9q8y3/
I decided a while back that I wanted my drone to be primarily black and did want just a glossy acrylic look but thought that wouldn’t suit it in the end. This is what made me lean more towards the carbon fiber texture instead. I had to re arrange the texture a bit due to the carbon fiber on each side not lining up. I had a small hiccup trying to upload it onto sketchfab where my texture wouldn’t load properly, however it was an easy fix as i had Ben sort it for me. Now it can be viewed below.
Loot Box Project – 25/02/2021
Task 1 – Initial Ideas
- Western
- Action, Adventure
- Upgraded Revolver
- Common
- A satchel or saddle bag
- Sci-Fi
- Horror
- Medical Kit
- Epic
- Cryo-pod
- Medieval
- RPG
- Potion pots or Spells
- Rare
- Century old Wooden barrel
Mood Board

Silhouette Thumbnail sketches

Line Drawing Thumbnail Sketches

Turn Around Sheet V1- 11/03/2021
So far I think I have designed what I want my final loot box to look like. My idea is a steampunk Sorcerer’s Crystal. This is where I feel the “enchanted” glow and the gems around the crystal would fit the design. On the inside I would have high level potions/spells for the Sorcerer to use and they would be indicated by any of the following colours; Purple, Red, Yellow, Orange or Blue. This item will also carry an Artifact title such as: Shadowfall, Flameguard, Silverlight or Military Aspect. Again this would depend on the quality and rarity of the item. After watching a lot of destiny, looter shooters and game play-throughs lately I thought I would try to design something that would fit into that universe and I think I have done well.
If I’m honest I was messing with the original line drawing you’ll see on the turn around sheet and came up with the basic shape, in Maya, which was similar to an octahedron. By this time in Maya I was really liking the basic shape of the loot crate and didn’t want to delete it so I decided to carry on. Then I was experimenting with the extrude tool and made the “outer shell” which encases that octahedron. This pushed me to make that gem on the front which would act as an interface/button. This would activate the Loot Crate opening sequence. From this I realised that the crate i modelled previously would already include all the detail i wanted without baking so I scrapped it and came up with the steampunk idea instead.
The only real challenges I faced were trying to find a colour palette that would fit the loot crate. I wanted parts of the crate to show flowing energy (including the Gem button) but without photoshop at home I haven’t been able to make a concept for that yet. The rest of the loot crate is a challenge as I haven’t got a clue on which colours to use as the main and accents. After switching to the crystal idea its really hard to stick with only 1 colour and a few shades.
I think for just dropping myself into this without a reference other than memory, I have done something that could be of high quality with the right textures. I could improve the little details on the crate either by adding more stuff or further improving what’s already on it.
High to Low Baking Plan – 18/03/2021
Around the whole loot crate I want to bake in screens that would be glowing on the crate. This adds to the sci-fi theme by showing off the hi tech look of the crate. Other things would be extra detailing on any light fixtures I have on the crate alongside the screens imprinted onto the crate. I want the light fixtures/buttons to be cracked and glowing as if the energy inside is trying to escape. Muck and grime will be added using photoshop when adding the texture to the UV map. If all the surface cracks/damage and the detail can be added by the bake, I will be happy with my final loot crate but if not I will have to model them separately to get as much detail as I can.
25/03/2021 – Blog Research
What is Topology?- The study of geometrical properties and spatial relations unaffected by the continuous change of shape or size of figures. It is the way that models flow and where your polygons are.
What is a Tri?- A triangular polygon is referred to as a tri or triangle, and is a simple three-sided polygon. It has exactly 3 vertices at its corners and 3 edges connecting those points.
What is a Quad?- A square or rectangular polygon is referred to as a quad or quadrilateral polygon, and is a four-sided polygon. This is the most desired type of polygon when creating digital models.
What is an N-Gon?- An N-Gon is a polygon with more than four vertices and edges. Due to its geometric properties, an N-Gon can always be divided into quads, tris, or a combination of the two; so they are always easy to remove by adding connecting edges between the border vertices.
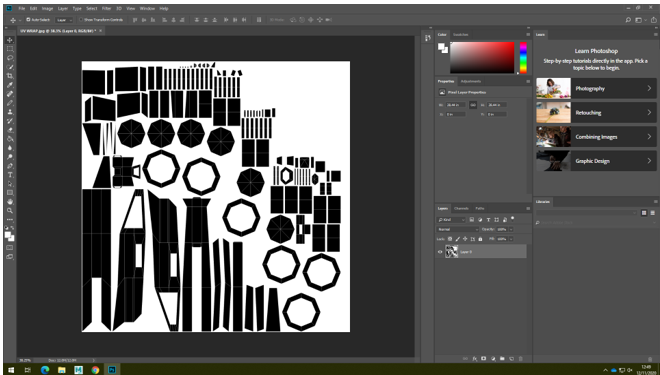
15/04/2021 – UV Unwrapping
What is a UV Seam? – A UV mesh is made of UVs similar to how a polygon mesh is made of vertices. Unfolding a UV mesh refers to the process of cutting a seam in the UV mesh and then unfolding along that seam. The process is similar to cutting a seam along a shirt and laying it flat on a table.
What is a UV Shell? – UV shells are a connected set of UVs in the UV map. UVs look like vertices, but UVs control how a 2d texture gets mapped onto the surface of the 3d model. The UV map contains your 2d texture and the layout of your UV shells that act as coordinates of where the texture is placed on the 3d model.
Why is the checkerboard pattern used? – A checker texture is a very efficient method for checking UV mapping to see if there is stretching, overlap, or incorrect scaling effects. Here, the texture is applied to the suitcase before any mapping has been done. Sizes are incorrect, the edges are wrong, and the top has weird stretching and diagonal patterns.
High to Low Poly Bake Review in Images-
Thumbnail Sketch-

Line Drawing-

Low Poly-

High Poly-

High to Low Poly Baking


